
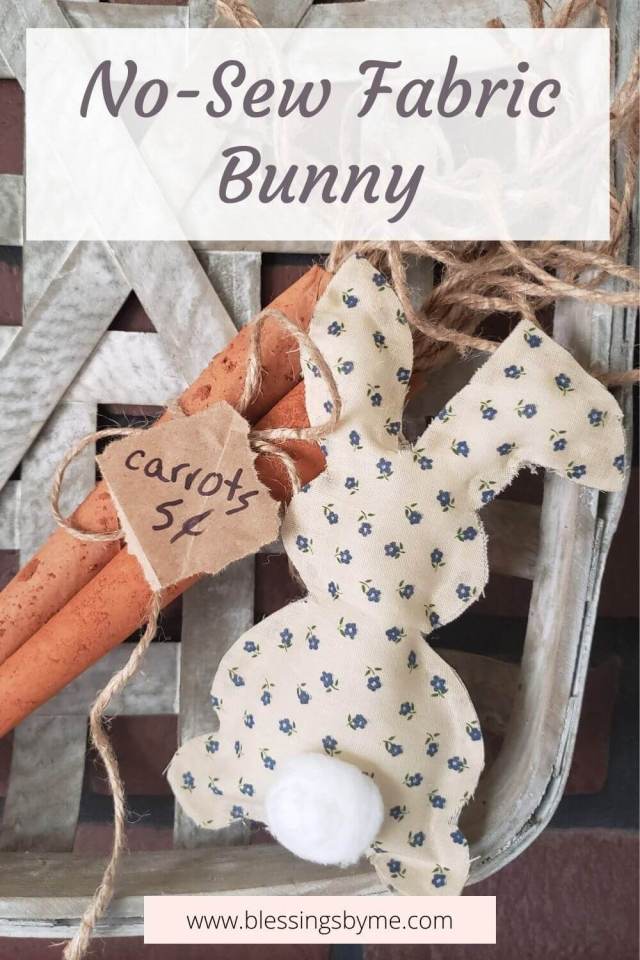
No-Sew Fabric Bunny
Use up your fabric scraps to make an adorable no-sew fabric bunny!

Last week I started working on my Spring crafts. I made some really cute and easy carrots out of paper bags.
I thought they looked kind of lonely on the shelf all by themselves, so I decided to make a cute little no-sew fabric bunny to go with them.
And I enjoyed making this bunny so much that I plan to make some more as soon as I get a chance!
This easy DIY is also part of this month’s Spring upcycle challenge hosted by Terrie from Decorate & More with Tip. Be sure to check out her blog for some fun inspiration ideas!
If you’re here from Terrie’s blog, welcome! I’m so glad you’re here!

How to make a no-sew fabric bunny
*Post contains affiliate links. They are free for you to click on, however, I will be compensated if you make a purchase. This supports my family and I thank you for your support! To learn more, click here.
What you need:

- Fabric scraps
- Bunny template (here)
- Cotton ball
- Poly-Fil
- Rotary cutter or scissors
- Hot glue gun and glue sticks
What you do:
Step 1
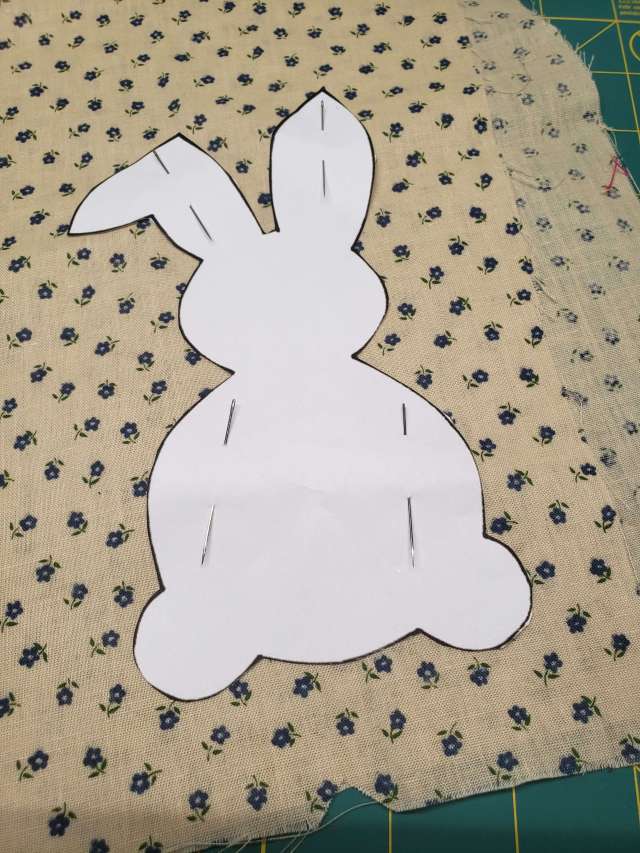
First, you’ll need to print and cut out the bunny template.
Next, take a piece of fabric and fold it in half. Or you can use two different colors. Either way, you’ll need 2 pieces on top of each other.
Lay the bunny template on top of the fabric. Pin it down so it doesn’t move while you’re cutting it. (FYI – I had to use sewing needles because I couldn’t get to my pins! lol!)
Step 2
Cut around the bunny template with a rotary cutter or scissors. I use a rotary cutter just because it’s easier for me.
You should have 2 pieces of bunny-shaped fabric.
If you accidentally cut through the ear as I did, it’s no big deal. It’s going to be glued together anyway.

Step 3
Lay the fabric pieces together with the wrong sides facing each other.
Start gluing the ears first, but don’t glue all the way around just yet. Add a tiny bit of Poly-fil to the ears. Be careful not to stuff too much or it will just come apart.
I used a chopstick to carefully push the stuffing into the ears.

Step 4
Now all you have to do is just keep gluing and stuffing!
Once you get to the bottom, leave a little hole to make sure you’re satisfied with the stuffing. If not, add a little more. Once you’re satisfied with the amount of stuffing, glue the hole shut.

Step 5
Grab a cotton ball and cut it in half. Use the hot glue to glue the cotton ball half to the no-sew fabric bunny.

That’s it! The no-sew fabric bunny is complete!

Now let’s go see what Corine is upcycling today!
Don’t forget to visit all the spring upcycle DIYs for some great inspiration!


DECORATE AND MORE WITH TIP | BLESSINGS BY ME | JUNK TO GEMS | CLOCHES AND LAVENDER


PATINA AND PAINT | PALLET AND PANTRY | B4 & AFTERS | PURPLE HUES AND ME

SWEET SOUTHERN GRACE
Looking for more Spring DIYs? I recommend these:
Grapevine Wreath DIY
Can’t Touch This Cactus Flower Pot
Upcycled Mailbox Planter

I love bunnies in decor. This is a great blog post. Thanks so much. Have a wonderful day!
Thank you so much!! 🙂
Just an FYI – Cloches and Lavender is a broken link.
Thank you! I’ll fix it. 🙂
Super cute! I love this bunny – especially with the carrots you made. So creative!
Thank you so much! 🙂
Michelle you continue to amaze me. I am definitely going to try this with my granddaughters. Thank you for the inspiration.
Thank you so much! They’ll have fun making these. 🙂
I love Easter decor and your bunny is so cute. Pinning!
Thank you so much!!
What pretty fabric! The bunny looks so nice with the carrots!
Thank you!! I’ve had that fabric for years and I’m glad I finally found something to use it for. 🙂
Love the bunny. ❤
Thank you so much!!
Michelle, you had me at NO SEW! LOL! P.S. Your bunny is the absolute CUTEST ever! I’m definitely making pinning so I can make one for Easter!
Thank you!! I have tons of fabric, but I just do not sew! haha!! 😀
This is so cute… and easy!
Can I ask you again to allow me to share it?
Thank you so much!
Yes, please feel free to share. I appreciate that!
🙂
Love the bunny addition, Michelle those carrots are the BOOM!!! Thanks for sharing!
Thank you so much!!!
I love any and all no-sew projects, Michelle! And your bunny is too cute and perfect for Easter!
Thank you so much!! 🙂
Michelle, another great project. Love it with your carrots. No Sew is PERFECT, for this girl!
Love the fabric too.
Cindy
Thank you so much!
I have tons of fabric but I just cannot sew. It’s on my list of crafts to learn, though! LOL
Love this! So creative, and I appreciate the no sew!
Thank you so much!
I love this so much! The bunny is so cute! And I especially appreciate that you don’t have to sew. That is not my favorite thing to do. Lol. Thanks for sharing!! ?
Thank you so much! I’m not a fan of sewing, either. Although it’s on my craft bucketlist! 😀
This is so cute, love this xoxo
Thank you so much!! 😀
It’s so lovely ❤
Thank you!
Your bunny looks so beautiful ? Michelle !!
Thank you so much!!
Michelle, you are always so creative and you are probably one of my fav blogs to read!
Thank you so much! You’re so sweet! And you’ve made my day!
I am happy to discover your website and your publications ?
Thank you!!
Welcome dear Michelle ?
A wonderful craft to do with the kids. Thanks for sharing, Michelle. 🙂
Yes! They would enjoy making this! 😀
OMG! Michelle, I’m absolutely in love with your blog and content! I’ve followed you across all socials. This no sew fabric bunny is the absolute cutest! I’m pinning this for later! Thank you for sharing xx
http://www.lynnmumbingmejia.com
Thank you so much! I’ve followed you as well and am really enjoying your blog, too!
Thank you for pinning this! I appreciate your support!
Always great ideas here. Hope we can celebrate Easter with grandchildren this year!
Thank you! It seems the restrictions are lifting in a lot of places. I hope you get to spend Easter with your grandchildren!
This is impressive! Bunny came out great.
Thank you so much!
Very cute! I always like to see how you have your creations displayed!❤️
Thank you so much!! Right now the only place I can put them is on the little shelf on my living room wall. Every other room is a mess! haha! 🙂
?Do you guys have a moving time in mind?
We’re supposed to close on the new house at the end of the month if everything goes smoothly. We want to paint a few rooms first, then hopefully move in sometime next month. 😀
Oh how fun!! Enjoy!!❤️
This is darling! I have a sewing machine, but I never use it, so it’s perfect for me, lol.
Thank you so much! My grandma’s sewing machine is stored away in a tote in my basement. I keep telling myself I’m going to use it one day! lol
This is just the cutest thing!!
Teresa!
Thank you so much!
The tail is definitely its cutest feature!
Thank you! I thought so, too! 🙂
Cute little guy!
Thank you!!
Thanks for the great idea and the directions. I will definitely be making these for myself, and maybe a few of my grandchildren would like to make one too. Your ideas are always inspiring.
You’re welcome! I hope you enjoy making them. And I hope your grandchildren make some, too! Thank you for your kind words! ?
Another great one! I’m loving these Easter craft ideas. ?
Thank you!! I enjoy making them. 🙂
Absolutely adorable fabric bunny !
Thank you for sharing with us at Meraki Link Party. We’re delighted that you joined the party.
Much love
Naush
Thank you so much!! Thank you for hosting!
Michelle, this is adorable!! I love how you used the chopstick to carefully place the stuffing. What a brilliant idea!
I think bunnies make for some of the sweetest little decorations around the home. Not sure what it is about them but they have some serious cute appeal, don’t they?
I’ve pinned & shared! As always, you create masterpieces. 🙂 Sending you my love & prayers in hopes that you and your family are well, my friend. ♥
Thank you so much! The fabric that I used for the bunnies was from scraps that my grandma was going to use for a project before she passed away. I’m so glad that I was able to put it to good use. I just love it!
Thank you so much for pinning and sharing! That means so much to me! We are doing well, thank you! I pray you and yours are doing well, too! Hugs and love!
Your No Sew Fabric Bunny is being featured on the Little Cottage Link Party tomorrow. I hope you can drop by.
Thank you! That means so much!