
Mini Topiary Tree DIY
Topiary trees have become somewhat popular lately, but I just don’t have the room for a big one. So I decided to make this mini topiary tree to sit on a shelf. And it cost less than $4 to make!

Welcome to August! I can’t believe we’re over half-way through the year. I really thought this year was going to just drag by. Some days have, though, I guess, but now it’s just flying by.
Its seems like after July the weeks and months go so fast! Am I the only one that feels that way?
Anyway, it’s the beginning of a new month, which means a fun DIY with some great DIY bloggers hosted by Terrie. She always comes up with some great challenge ideas for us!
If you’re here from Christine’s blog, welcome! I’m so happy to have you here!

This month our challenge was to make something using dowel rods. I had so many ideas of things to make, but I chose to make this mini topiary tree so I could put it on my bathroom shelf.
After my post I’ll share links to the other DIY’s so you can see their amazing ideas, too.
How to make a mini topiary tree
*Disclosure: This post may contain affiliate links, meaning I earn a commission if you click through and decide to make a purchase. Thank you for supporting my blog!
What you need:
- 1/4 inch foam balls
- 5/16 inch dowel rod
- reindeer moss (I got mine from Dollar Tree)
- succulent flower pot
- hot glue gun

Dollar Tree has these cute little succulent pots in different colors. I forgot to take a picture of it before I removed the succulent, but this is similar to the one I got, except the succulent is green.
What you do
- Remove the succulent from the pot and cut your dowel rod to about 4 inches long.
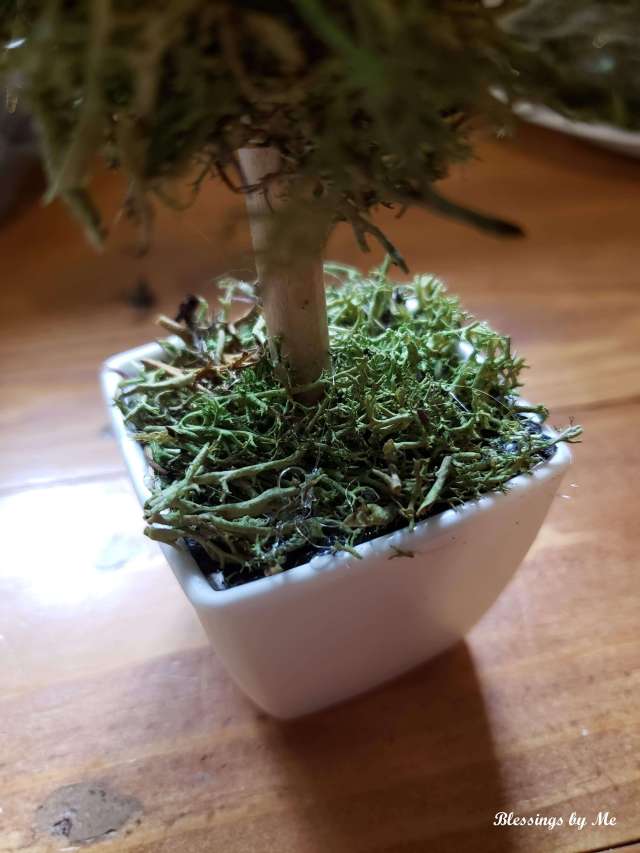
- Slide one end of the dowel rod into the styrofoam that’s inside the little succulent pot.
- Slide the styrofoam ball onto the other end of the dowel rod. To make this easier, I stuck the end of a ballpoint pen in the foam ball to make a tiny hole. You now have the base for your mini topiary tree.
- Using hot glue, place reindeer moss all over the styrofoam inside the succulent pot. Just cover up the bottom so you can’t see the styrofoam.
- After that part is dry, do the same thing to cover the styrofoam ball. Once the styrofoam ball is covered, trim up the reindeer moss to make it look less straggly. Tip: If your hot glue gun has a lower setting, use that because if the glue is too hot it will melt the styrofoam.
- Let the hot glue dry and your mini topiary tree is complete!


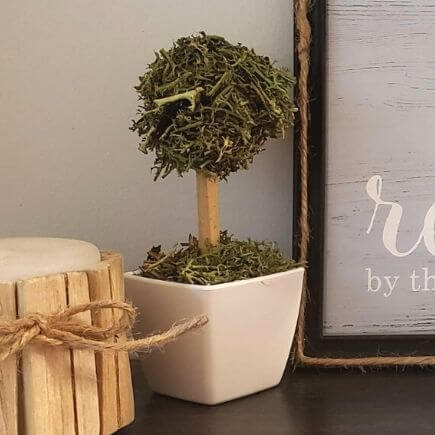
I think the mini topiary tree is so cute! It’s great for sitting on shelves in areas where you don’t have a lot of space.
Next, let’s see what Liberty created for this month’s dowel rod challenge.
Keep scrolling to see what the other creative bloggers came up with month for the dowel rod challenge.
Click here to see all of my Dollar Tree DIY’s!


More dowel rod DIY inspiration:


Ohhhh how cute Michelle, I love the way it looks, and as always so simple to make 🙂 <3
Thank you so much! 🙂
What a cute decor piece that cost little to nothing to make. I need one or two for our home!
Thank you so much!!
Oh my goodness, Michelle your mini topiary is SO cute! I actually have one of these little pots, I’ll just need to get the styrofoam! Such a fun idea for my mini shelf in my home office! Thanks for the inspiration!
Thank you so much! It would go great in your office. 🙂 I hope you get to make one soon!
So pretty ❤
Thank you so much!
This is so adorable. I have a bunch of those mini succulent pots left over from a project I did using just the succulents. Now I know what I can do with them.
Thank you so much! They’re so fun to make, too. 🙂
Small stuff just brings out the “Aww” factor for me. Yep, you guessed it, your DIY made me feel all fuzzy inside. That is such a cute little tree!
Great tip about turning down the hot glue gun setting when working with styrofoam. It’s something I wouldn’t have known, as someone who doesn’t have the crafting gift you do!
I love your creations, Michelle. They are fun, creative, and one-of-a-kind. I’m grateful you share them here with all of us. There’s a whole lot of people out there de-stressing and getting creative all because of you!
BIG hugs and much love to you, my friend. ?
I love small stuff, too. I’m obsessed with dollhouses and miniatures! I wish I had room for it all! 🙂
I learned the hard way about the hot glue melting styrofoam. Let’s just say that was a project fail and a huge mess! 😀
Aww…thank you so much! You’re so sweet and I appreciate you so much.
Sending big hugs and love your way!! 🙂
It might have been a project fail, but I bet it gives you some good laughs looking back on it now. 😀 We must admit, sometimes our fails are hilarious.
You’re awesome, Michelle. Never forget it!
This is so darn cute! Now I want to make one! This would be a perfect addition to my tiered tray. It is always difficult to find things small enough to display on it! Pinned!
Thank you so much! It would be perfect for a tiered tray! Great idea! Thank you for pinning! 🙂
So cute! I love it! And it doesn’t look too difficult for someone like me who is not too crafty! 🙂
Thank you! LOL! It’s super easy to do. Just a little messy with the moss. You could totally do it! 🙂
They’re so cute and so easy! ❤️
This definitely looks like a fun project Michelle! Thanks for sharing. Hope that you’re having a great week!??
Thank you so much! 🙂 I’m glad the week is almost over, lol. I hope your week has been well!
Michelle, this is so cute and easy. Thanks so much for sharing!
Thank you so much! 🙂
Lovely!
Thank you!
Dollar Tree sounds like paradise, we have Poundland in the UK with many random things that can be used for DIY projects, but it looks like Dollar Tree has much a much wider range!
I love Dollar Tree. I’m sure you would, too! The closest one to me rarely has the good stuff so I have to travel a little further out to get what I want sometimes. Poundland sounds interesting, too. I just love all stores like that. 🙂
Ahhhh Michelle!!! That’s so cute and I love what the fellow DIYers came up with as well!!
Thanks for sharing!!❤️
Thank you so much! It was a lot of fun to put together, too. Messy, but fun. ?
What a great idea and a great way to save! Topiaries are so expensive!
Thank you so much! I agree. They’re pretty, but I don’t want to pay that price.
Such a cute project, Michelle. Perfect if you want green inside but cannot really keep plants.
Thank you so much! 🙂
This is so cute!
Thank you so much! 🙂
Dollar Tree is my favorite of the “dollar” stores, but I have found that they vary greatly. I was in awe at the size, cleanliness, quality of stock, and friendliness of staff when I went to visit a sister-in-law in Tyler, Texas. It put the one I frequented in a little town in NM before I retired to shame.
It’s the same way here. It’s amazing to me how different they all are.
What a fun project! Thank you for sharing with Creative Compulsions!
Michelle
https://mybijoulifeonline.com
Thank you so much!
What a cute idea – and it looks so easy. There’s nothing I love more than a quick new decoration I make myself. Thanks for the idea!
Thank you so much! I love quick and easy projects, too.
What a great DIY! Its so small and cute, and would look perfect on the side. I love how easy and quick this DIY is.
Thanks for sharing!
Aimsy xoxo
Aimsy’s Antics
Thank you so much!! ?
Very pretty!
Thank you!! ?
Interesting article. Thank you.
Thank you so much!